
Docs
Boosting Rewards
If you are interested in Facture's boosting rewards, you're in the right place!
- Embed links/attach file permissions instantly!
- You get to bypass slow mode in all channels!
Server Contributor
- Bypass Slowmode
- Attach Files, without having to level up.
- Embed Links, without having to level up.
- Special Role Icon.
- Special @Contributor role.
- Gradient role coloring!
Role Leveling
Role leveling system.
- Level 5 - Embed/attach file permissions
- Bypass Slowmode
Donator Perks
- Donator role in the discord.
- Access to donator local-host uploads.
- Bypass Slowmode
- Embed/Attach file permissions
- Access to BETA uploads!
Warning System
- 2 warnings - 2 minute timeout
- 4 warnings - 10 minute timeout
- 5 warnings - Jailed (With ability to appeal.)
- 7 warnings - Kicked (1 use invite sent to dms so you can rejoin.)
- 9 warnings - 24-hour mute
- 10 warnings - Jailed again (with ability to appeal, possible ban.)
ID Verification Process
There are three ways to get ID verified.
Government ID Verification
- Step 1: Prepare a Valid Government-Issued ID. Before beginning the verification process, ensure that you have a valid government-issued photo identification document available. Acceptable forms of identification may include a driver’s license, state-issued ID card, REAL ID, passport, or other government-issued identification.
- Step 2: Obtain a Blank Sheet of Paper. Prepare a blank sheet of paper that will be used as part of the verification process. Ensure the paper is clean, legible, and large enough to display any required information clearly in a photograph.
- Step 3: Prepare Your Identification Document. Place your government-issued identification document on the sheet of paper. For your privacy and security, redact, cover, or blur all information on the ID except your Date of Birth (DOB). Ensure that the Date of Birth remains clearly visible and readable in the final photograph.
- Step 4: Record Your Account Information. On the same sheet of paper, clearly write your Discord username (not your display name) alongside your Date of Birth (DOB). Ensure that both pieces of information are legible and match the information associated with your account and identification document.
- Step 5: Submit Your Verification Request. Take a clear photograph showing the required verification materials. Once the photograph has been taken, open a support ticket and submit everything for review.
Roblox Verification
- Step 1: Open Roblox.
- Step 2: Press the gear icon in the top right, then click Settings.
- Step 3: Record a short video of your age range and whether you are ID verified or not — you must be ID verified on Roblox to be verified via this method. Refresh the page a few times in the video to confirm the website wasn’t tampered with, then open a support ticket and submit everything for review.
Cross Verification
You can only cross verify from servers we are partnered with.
- Step 1: Go to the server that we are partnered with, open your profile, and keep everything in view.
- Step 2: Take a screenshot of your profile, including your roles, so we can see if you have the verification role in that server.
- Step 3: Open a support ticket and submit everything for review.
Localhost Game Tutorial
To join a localhost Roblox Studio game, you must have at least NEP installed.
- Step 1: Install NEP using the download button below.
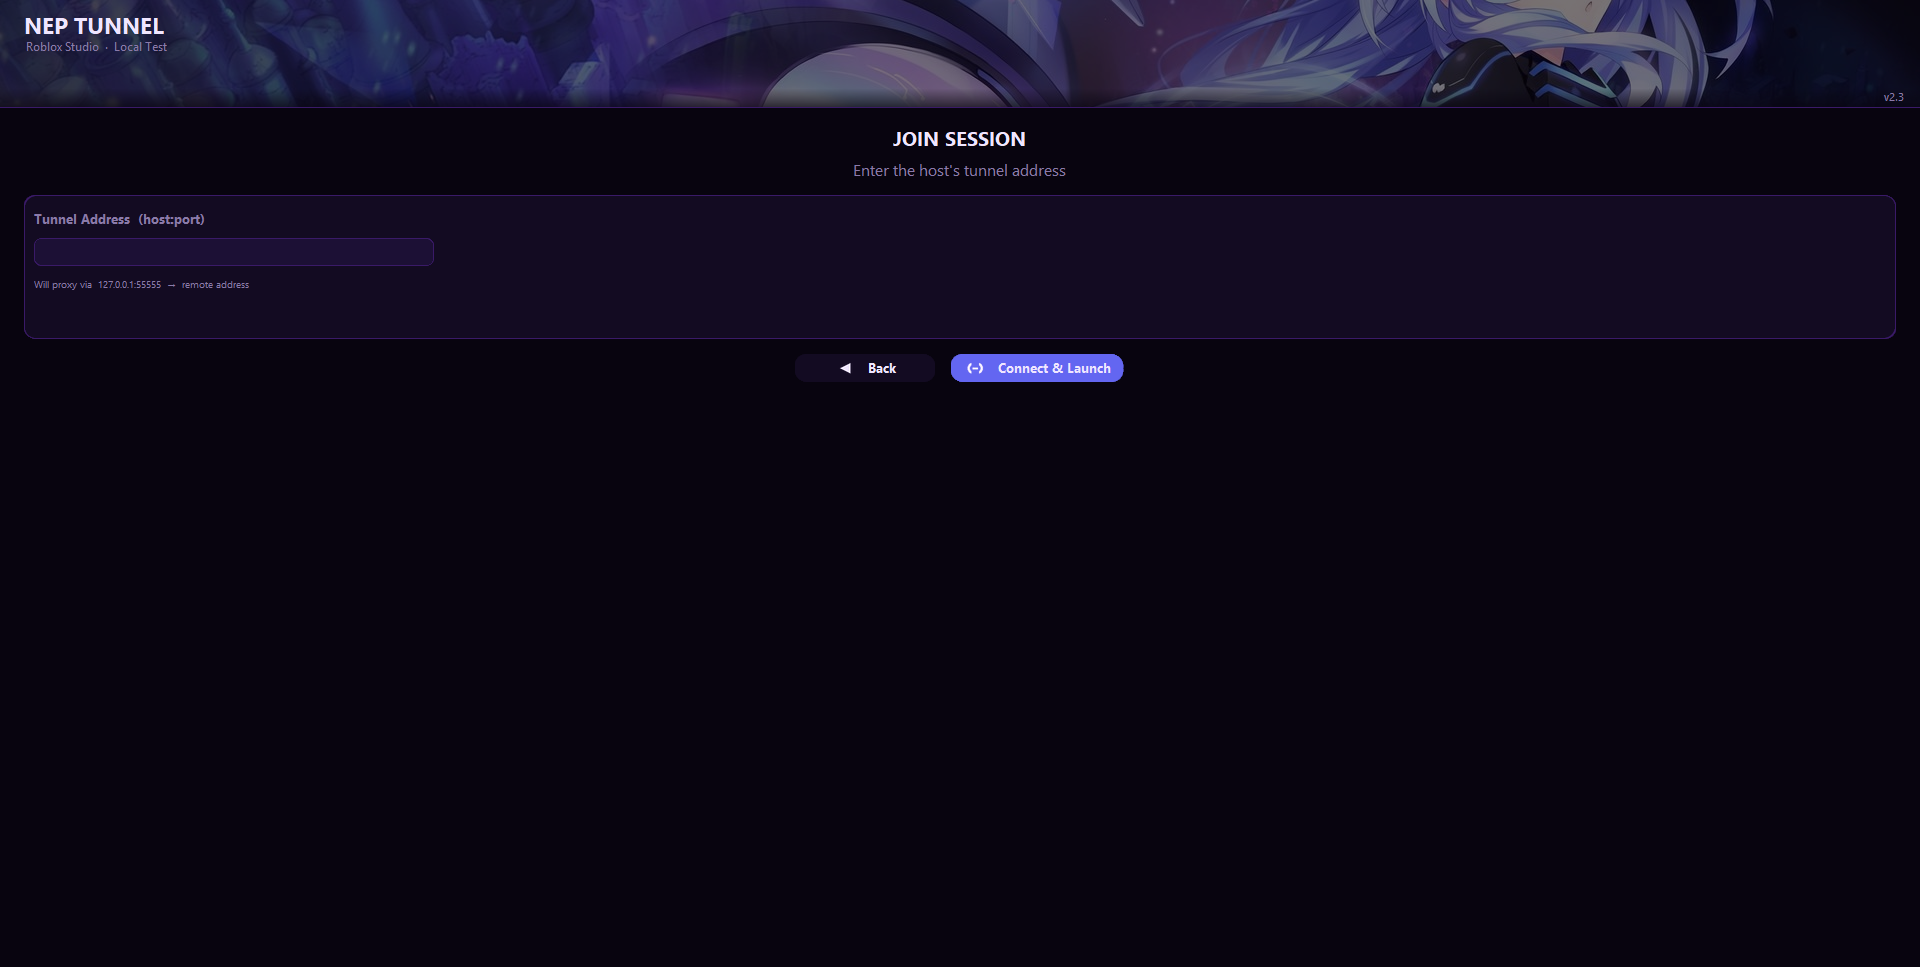
- Step 2: Once NEP is installed, open it up, click “JOIN SESSION” and paste the IP and port there, then press “Connect & Launch.” And you’re in — Roblox Studio will automatically launch, and the game will open.
Vfuse Verification Tutorial
For specific uploads, we now use vFuse to verify user accounts and prevent impersonation, exploiting, etc.
What Vfuse Can Access
- Vfuse Discord Bot: Usernames, banners, profiles, etc. All account information accessed is only public information that can be seen by anyone.
- Roblox Authenticator: Roblox user IDs, Roblox usernames, etc. All account information accessed is only public information that can be seen by anyone.
Verification Steps
-
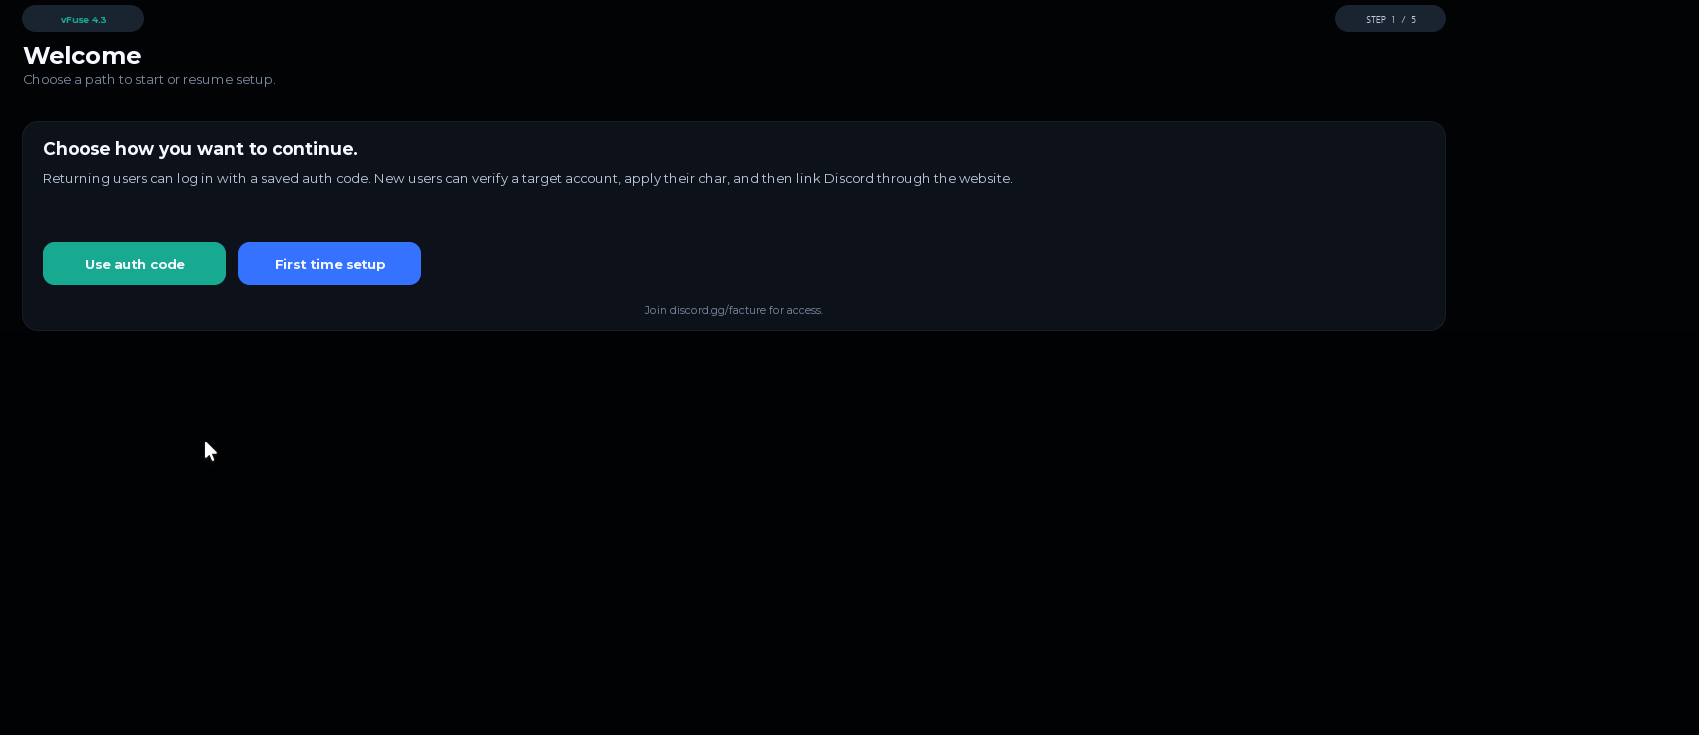
Step 1: Choose How You Want to Continue. Once you join the game, a menu will show up. For all new joiners, click “First time setup.”
-
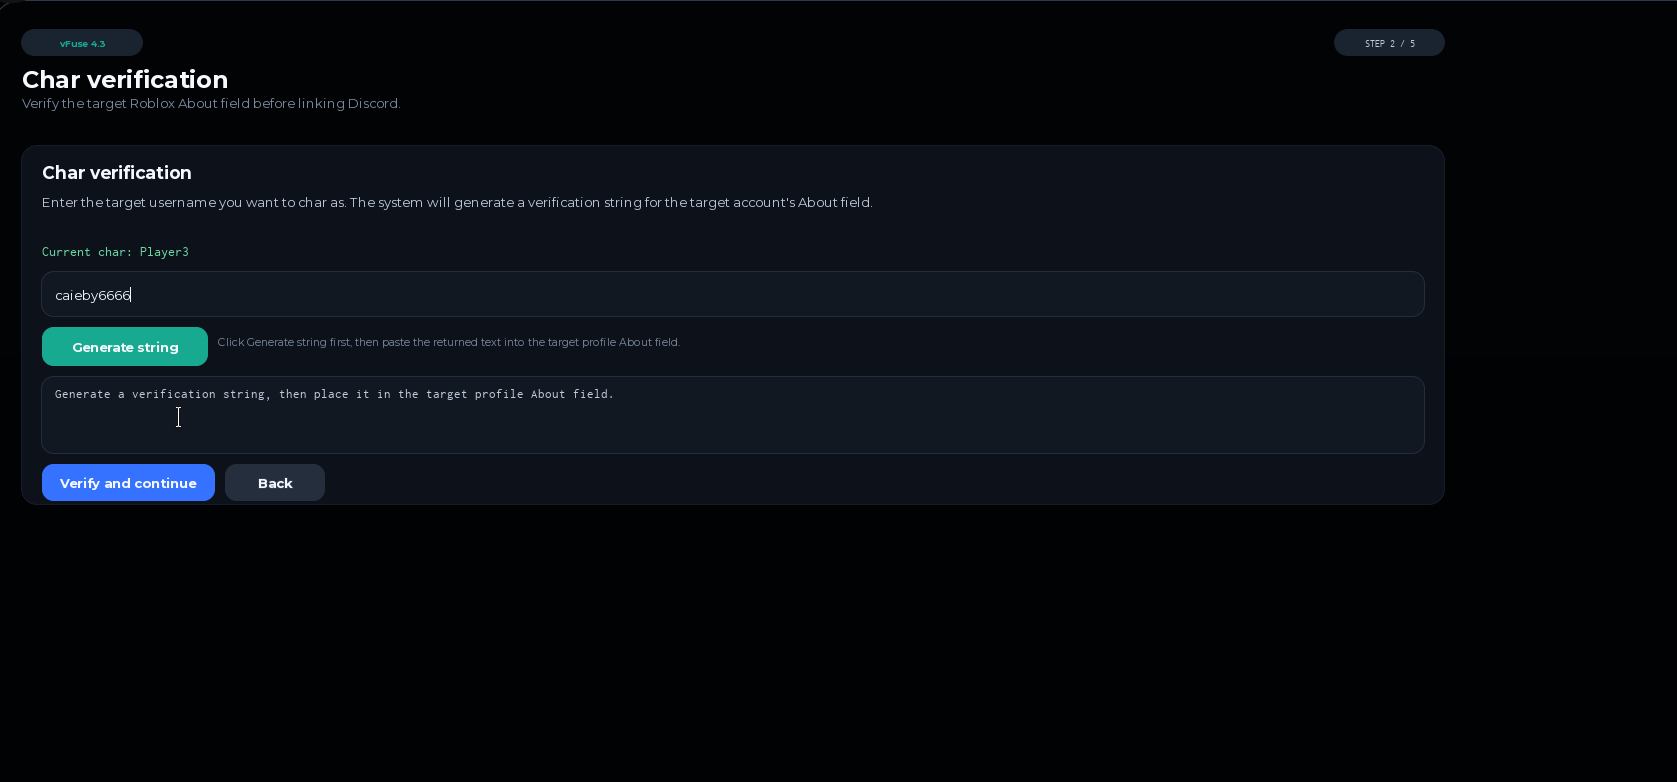
Step 2: Verify Your Roblox Account. Type in your Roblox username, click “Generate string,” and paste the random text generated into your Roblox bio. Once that’s done, click “Verify and continue.”
-
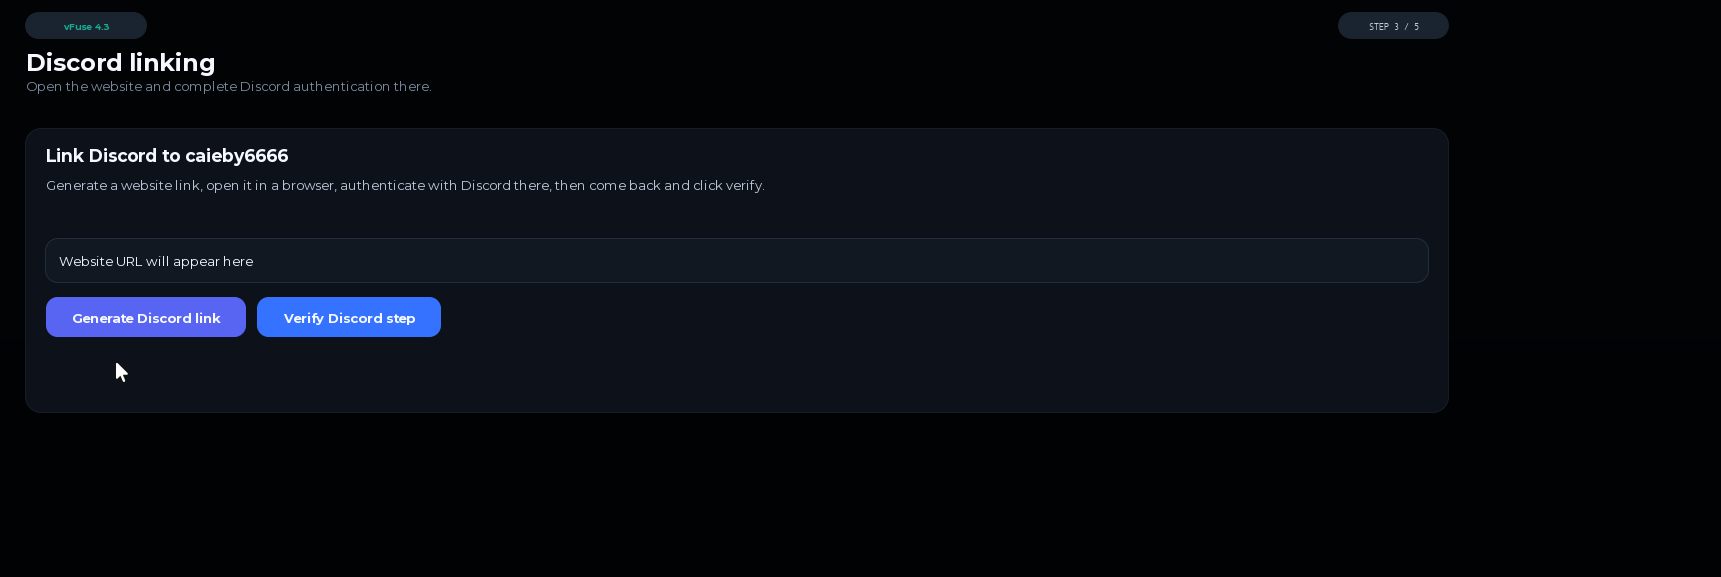
Step 3: Link Your Discord Account. After your Roblox account is verified, you must link your Discord account to our Discord bot — you must be in our server in order to do this. Click “Generate Discord link” and paste it into your browser of choice.
-
Step 4: Authorize the Bot. Click “Authorize.” The bot can only access your username, avatar, and banner, and read your member info such as nickname, avatar, roles, etc. We do not collect personal information.
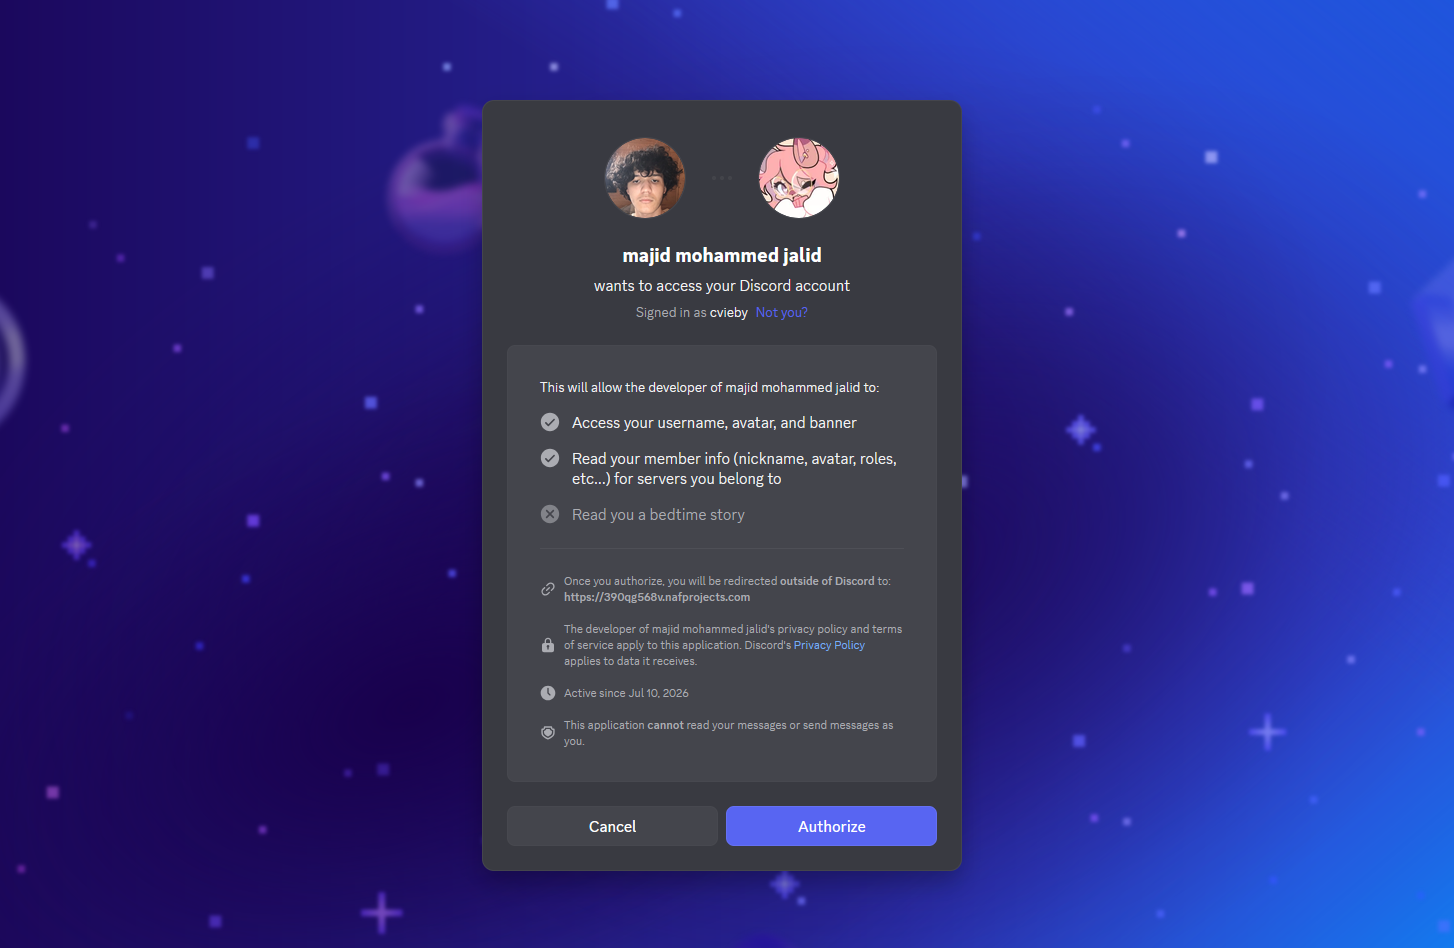
- Step 5: Save Your Auth Code. Copy your auth code and save it somewhere secure — this is your personal key to access the game. If you ever lose your personal auth key, open a support ticket in the Discord server and we can retrieve it for you.
- Step 6: Finish in Studio. Go back to your Studio application, click continue, and paste in your auth code. You’re in!
How to Use Outfit Changer (GOAT)
Follow these instructions closely to figure out how to use our inbuilt outfit changer.
-
Step 1: Copy this URL into your browser (do not press enter yet):
https://avatar.roblox.com/v1/users/[YOUR USER ID]/outfits - Step 2: Replace
[YOUR USER ID]with your Roblox user ID. You can get this by going to Roblox, going to your profile, and looking at the search box. You should see something likehttps://www.roblox.com/users/1234567890/profile— the number after “users/” needs to be copied; that is your user ID. - Step 3 (Final Step): Go back to Step 1 and replace
[YOUR USER ID]with your actual Roblox user ID (without the brackets). It should bring up a list of all of your outfit names and outfit IDs.
Staff
Interested in joining the Facture Team? Click the button below to apply — in the application, you’ll be able to choose from any of our available positions.